Rear wheel bearings removal on the Transalp
Step by step on how to remove the rear wheel bearings on a Honda Transalp.
Since we are changing tires on the Transalp we have the wheels off and every time you have the wheels off its good to look over the bearings and lube them up to prevent water and dirt from getting in and destroying them.
The outer box seal can be pried out with a screwdriver:

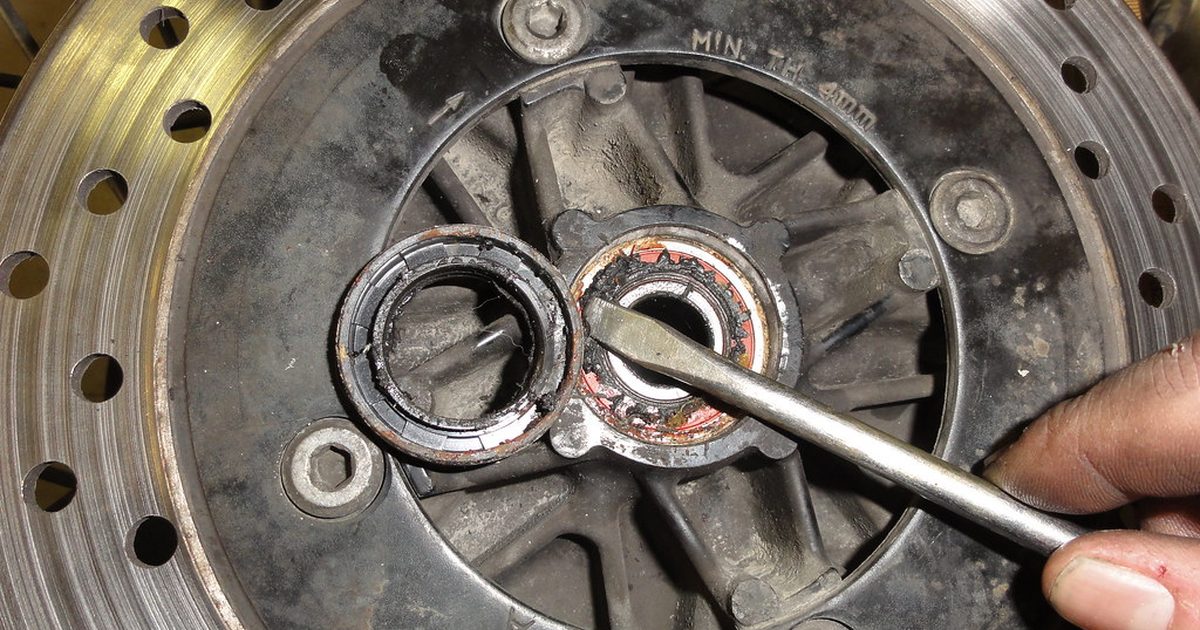
And to go deeper and get the seal on the bearing side a dentist torture tool is good, don’t worry if you poke a small hole in it if you do this every time you have the wheel off for any reason and add more grease that will keep everything out and the bearing will last for a long time:

And down here the grease that can be seen have stiffened up to hard lumps and signs of corrosion can be noticed and also when rotating the bearing some resistance can be felt, if you just do local rides it might be worth trying to add fresh grease and squeeze out the last but if a long trip is near replace:

There is a spacing tube between the bearings to take up the sideways force when tightening the wheel bolt. On the first try the bar I used to hammer the bearing out didn’t have a sharp enough edge to catch on and force the bearing out its also good to make sure there is no lock ring holding the bearing in place some bikes have that, the Transalp did not:
And after some searching in the garage I found a piece of tube with a sharper edge, it was a little big in diameter so it was a bit hard to angle it to get better grip, keep moving around so the bearing comes out straight:
And then the other side come out easy:
The Transalp has a sprocket carrier with a third bearing in it, but it felt good and the grease inside was not hard:

So just lubed that up and put the side seal back on:
